
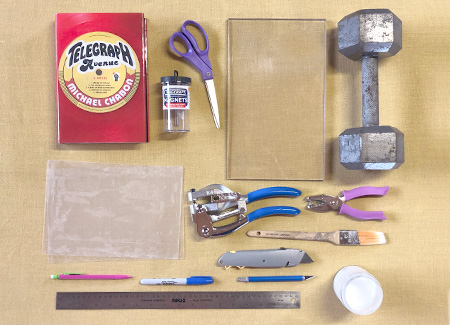
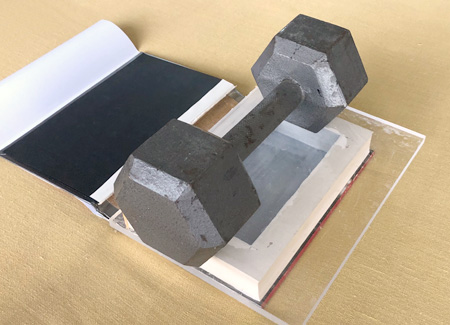
 You Will Need
- Book
- Magnets
- Scissors
- Top slab
- Weight
- Plastic dividers or plastic wrap
- Die punch
- Paper punch
- Brush
- Box cutter
- Pencil
- Marker
- X-Acto knife
- Ruler
- Glue
You will also need the shop tools. See the Supplies page for more information on all these items.
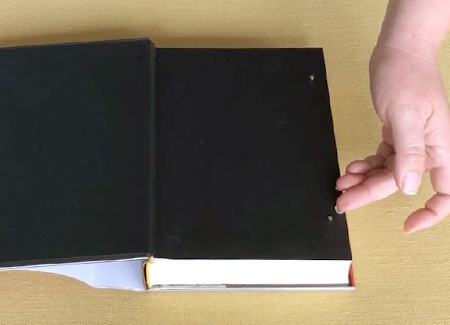
Stage 1: Prepping the book for magnets.
 Step 1: Remove the dust jacket.
Set it aside for now; you'll put it back on later.
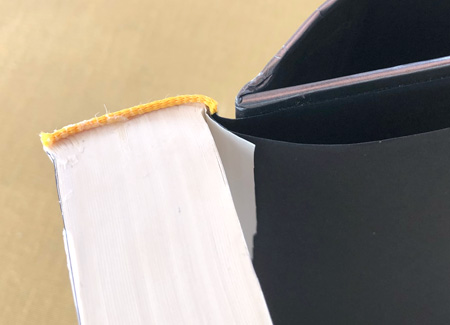
 Take a look at the front endpaper. This sheet of extra thick paper is glued to the cover (on the left side) and the front of the page block (on the right) and it holds the book together. The endpaper in this book is black, but in most books it's plain white.
You need the endpaper to re-assemble the book after you've cut out the cavity, so it must be kept in good condition.
 In most books, you have one regular page glued to the endpaper, known as the "first sheet". This page is NOT necessary, and will get in the way later, so if your book has one (and most do, and some books have more than one) you'll start by...
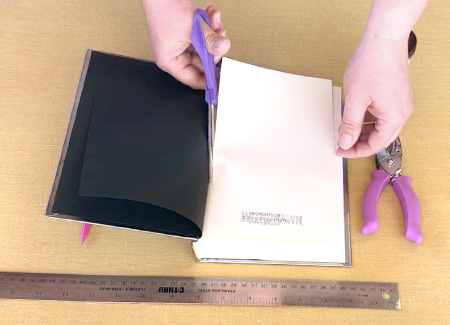 Step 2: Cut off the first sheet, if it's glued to the endpaper.
Use scissors and remove the first sheet. If multiple pages are glued to the endpaper, cut them all off.
You don't have to be super neat about this; you just want to get rid of this page so it's not in the way later when you re-assemble the book.
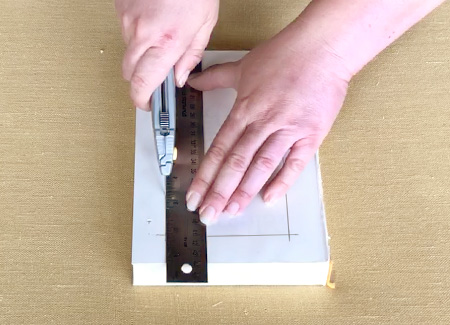
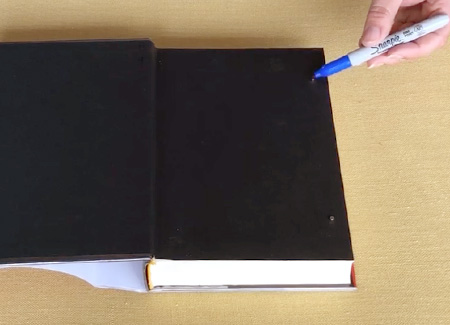
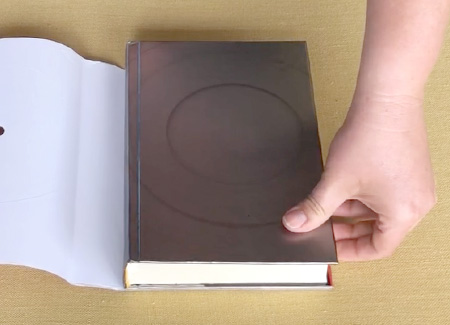
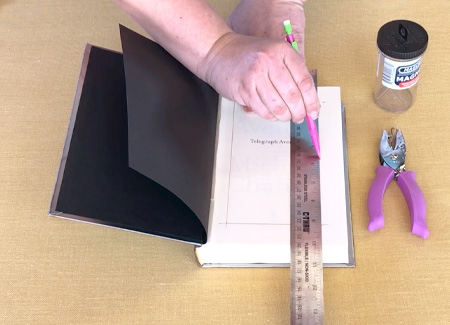 Step 3: Mark out the cavity.
On the next page, measure and draw a rectangle where you want your cavity to be. For larger books, the walls should be about an inch thick. For smaller books, it can be more like 3/4 of an inch.
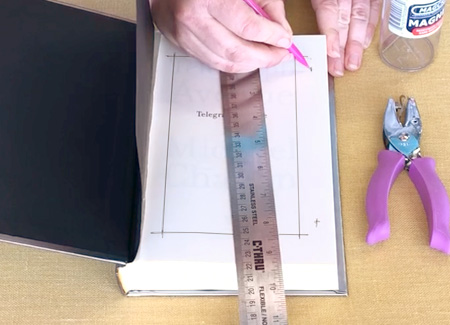 Step 4: Mark the location of the bottom magnets.
Two bottom magnets must be placed in the outside wall. (The top magnets will be embedded in the cover later.)
The exact placement is optional, but I like to put the magnets in the middle of the wall, 1.5 inches from the top and bottom.
Two magnets are usually sufficient, but you can do three if you have a very large book.
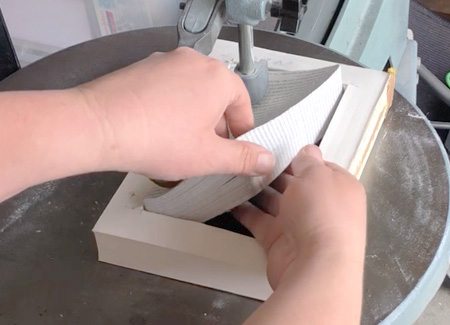
 Step 5: Gather a stack of pages as thick as a magnet.
Pinch a stack of pages off the top that look about as thick as a single magnet. Push them back, place a magnet next to them, then press your thumb across the magnet and the pages to make sure they're the same height. Add or remove pages as necessary until the stack is the right size.
If you can't find the exact number of pages, err on the side of the stack being too thick, rather than too thin, so the magnets won't stick up out of the holes.
 Step 6: Punch the holes for the bottom magnets.
Use the 1/8 inch paper punch, and put holes in the page stack at the marks you made in Step 4. Keep the pages straight when you punch; crooked pages make a crooked hole.
Stage 2: Gluing the outside
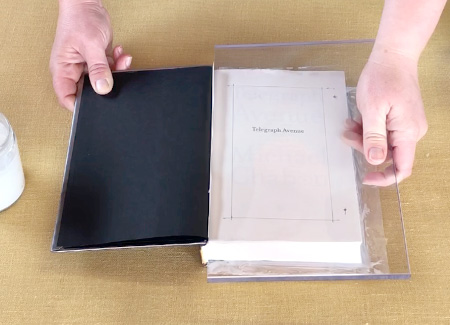
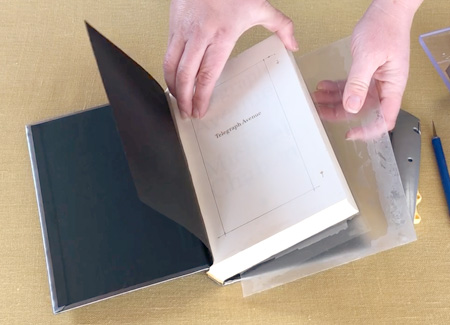
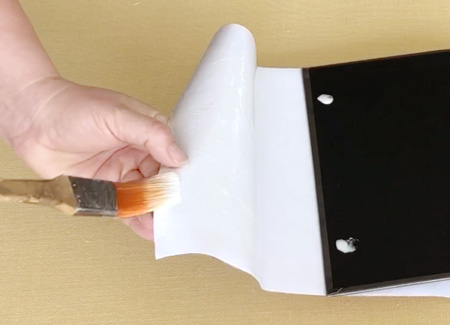
 Step 7: Separate the page block with plastic sheets or plastic wrap.
You're gluing the outside of the pages, but you don't want to glue them to the cover in the process. I use flexible translucent plastic sheets to protect the covers, but you can also use plastic wrap.
Insert one plastic sheet between the back cover and the bottom page.
Place another plastic sheet between the front endpaper and the rest of the pages. You want your front endpaper protected so that it's NOT glued to the page block.
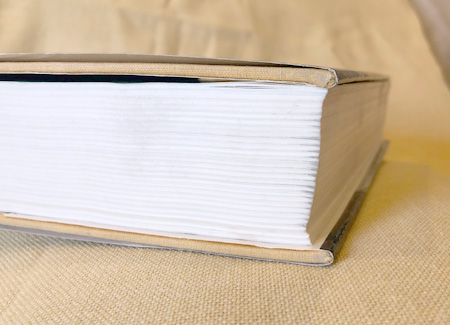
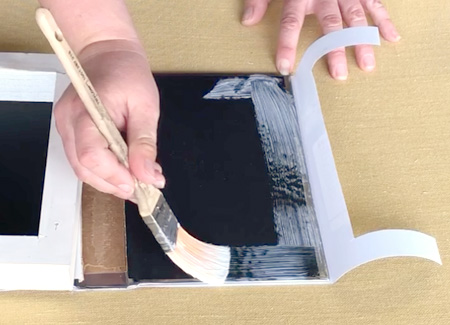
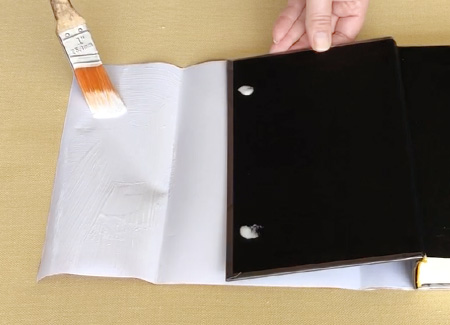
 Step 8: Paint the sides of the pages with glue.
This should be a thin but complete layer around the entire outside of the page block. This glue will keep the pages together when you take the book apart.
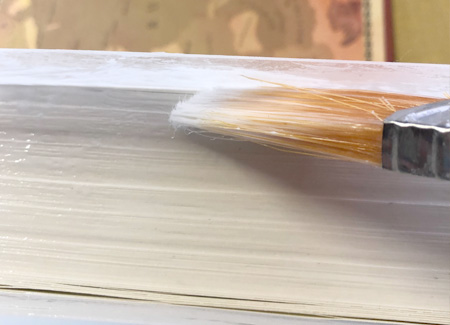 Run the brush up against the plastic dividers on the top and bottom, so the glue goes all the way to the edges.
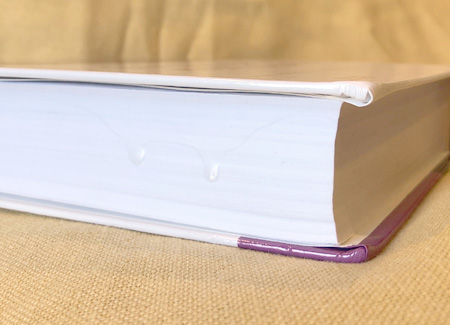
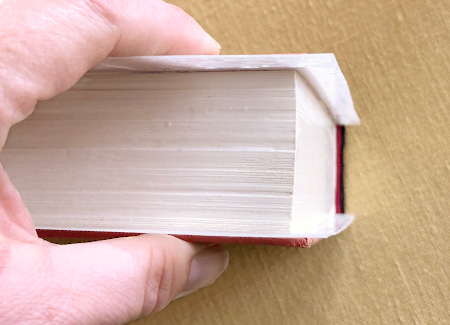 Step 9: Straighten the page block as much as possible.
It's important to get the page block straight and squared up on all sides. Tilted or twisted pages will ruin your book.
 See this tilt? This is what you want to avoid.
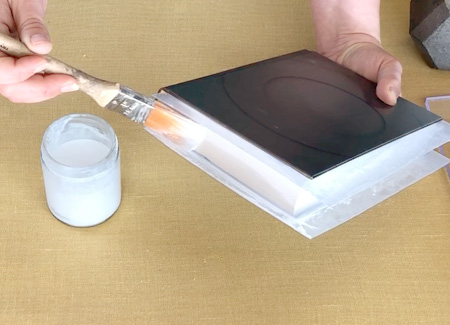
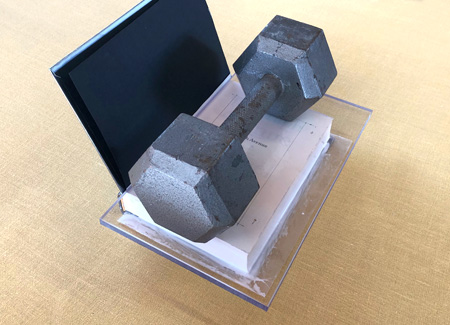
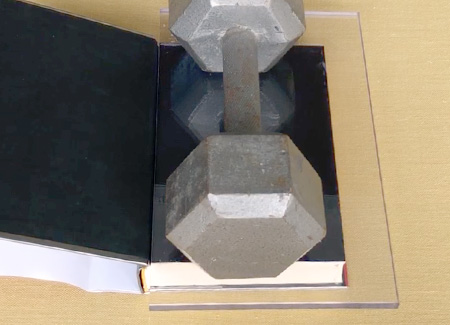
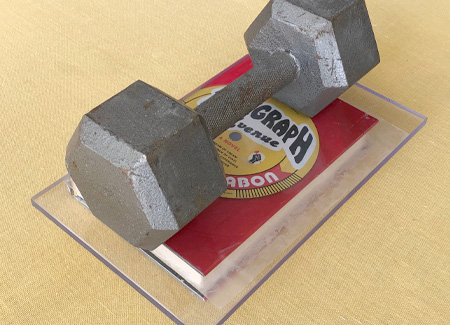
 Step 10: Place the top slab onto the book and weigh it down.
Place a flat, sturdy slab on top of the book. Since I'm using acrylic plates, and the glue won't stick to them, I can remove the top plastic divider; if your top slab might stick to glue, leave the plastic in place.
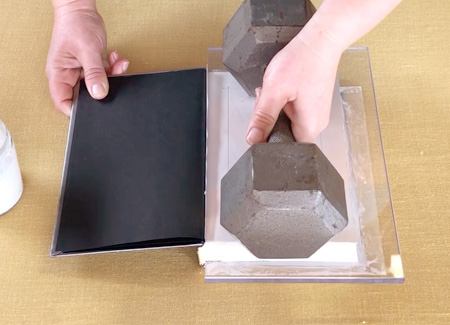 Place a heavy weight on the top slab. Use something between 25 and 40 pounds depending on the size of the book.
 Step 11: Do a final quality check, then let it dry.
Make sure that everything is straight, and that there's no glue drips on the sides. (Dried glue drips can be sanded off later with a Dremmel tool, but it won't look great.)
 Let your book dry. I like to give it 24 hours, but you may need more or less time depending on temperature and humidity. It's always better to err on the side of a longer drying time; taking the weight off too early can allow the pages to warp.
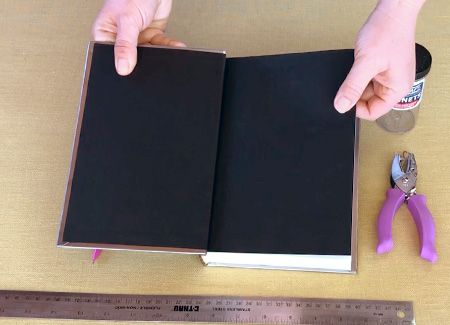
Stage 3: Cut out the page block and prep for sawing.
 Step 12: Remove the book from the setup.
Take the weight off, and remove the top slab and the plastic dividers. If you're using plastic sheets, or plan on re-using your plastic wrap, now's a good time to clean them a bit by peeling off the bigger blobs of dried glue.
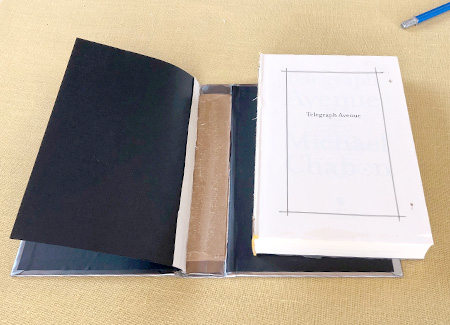
You now have a book with a loose front endpaper and a solid block of pages. Time to cut that page block out.
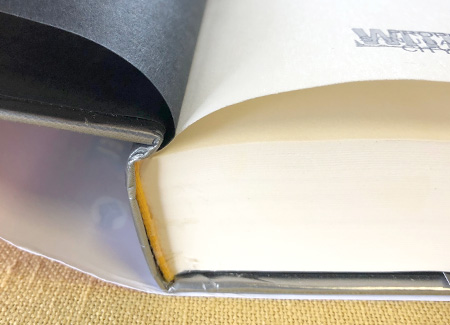
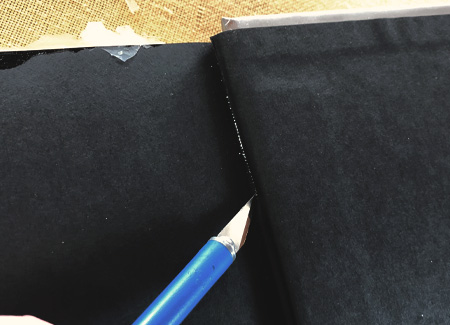 Step 13: Cut through the back endpaper.
Take an X-Acto knife and carefully slice the endpaper between the page block and the back cover. You want to cut the endpaper ONLY, and not the cover behind it.
 It should look like this when done.
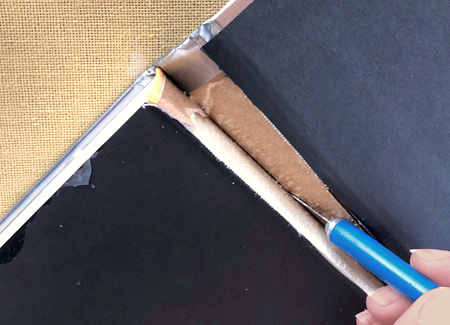 Step 14: Cut away the cover's spine.
In smaller and cheaper books, Step 13 is all you need to do, but larger and higher-quality books often have layers of materials and glue attaching the page block to the cover spine.
Cut through this, very slowly and carefully, to free the page block without cutting the cover.
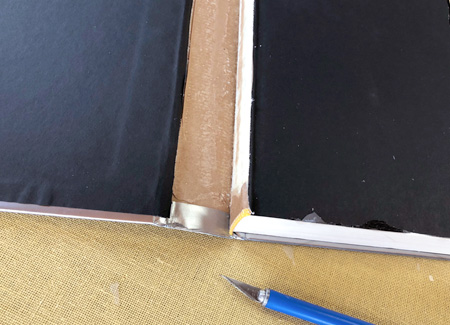 The final product can look messy, but this will be hidden in the end.
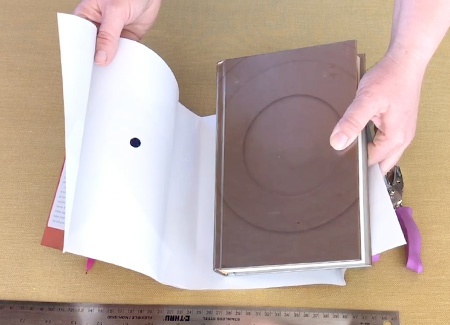
 Step 15: Cut out the page block at the front.
This step is difficult: cutting the page block free WITHOUT cutting the front endpaper.
Flip the back cover around and hold it against the front cover to isolate the area.
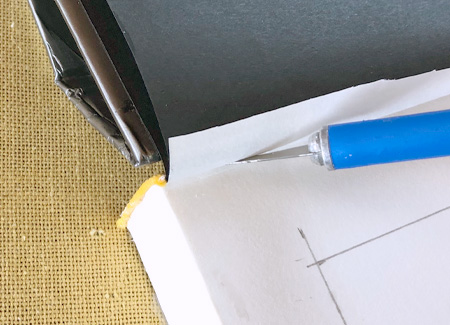 Figure out the best angle to insert the X-Acto blade between the front endpaper and the page block. Work slowly and carefully, slicing down the entire length of the book without nicking the endpaper.
 Success!
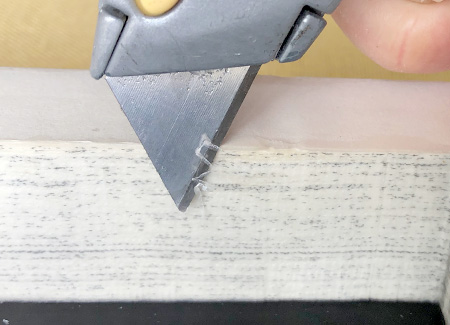
 Step 16: Trim dried glue off the edges.
Run a blade along all edges of the page block to trim off protruding dried glue. You don't want this extra glue showing when you re-assemble the book.
I use a box cutter for this, as I can get a better grip, and the wider blade makes it easier to hold parallel against the page block, so I don't cut into the paper by accident.
 Step 17: Cut the cavity top with a box cutter.
Take a ruler and a box cutter and cut out the rectangle you drew in Step 3.
Start and end cuts about 1/4 of an inch outside of the rectangle to make sure the paper is cut all the way through at the corners. Press hard and keep the blade straight down: an angled cut will mess you up later.
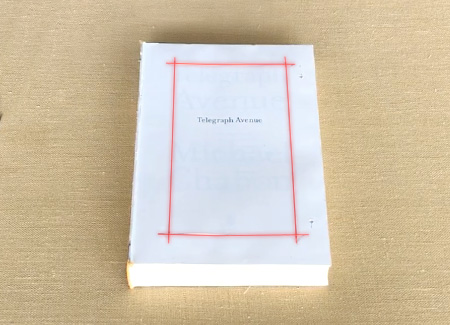 The red highlights show where the cuts should be.
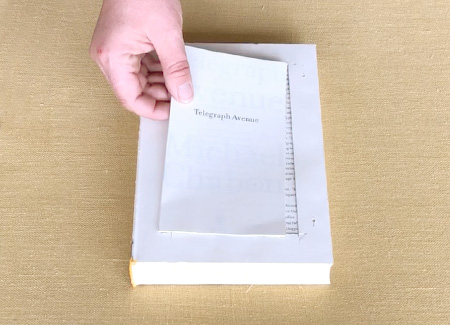 Step 18: Remove all the paper that's completely cut out.
Peel out all the paper that's been cut free. This may be only a dozen or so sheets. Any paper still attached to the book can stay where it is.
 Why do this first cut by hand, when you're taking the page block over to the scroll saw next? Well, it's notoriously hard to cut straight on a scroll saw. The rectangle you've just cut out will be a guide that's easier to follow than any drawn lines.
Stage 4: Drilling and Sawing
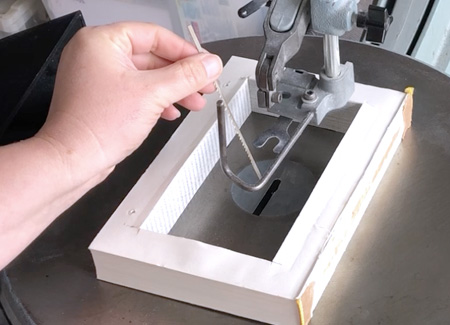
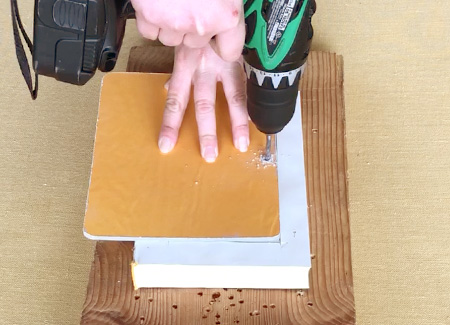 Step 19: Drill a pilot hole through the page block.
If you don't have a drill press, lay the page block on a scrap piece of wood. Plan to drill the hole inside the cavity, near the edge of the rectangle but not touching it.
Put something stiff on top of the page block (a thick piece of scrap chipboard, colored yellow, is shown in the photo) and press it down hard with your free hand while drilling. This pressure will keep the paper from bunching up around the drill bit, which makes the pages bulge out in both directions.
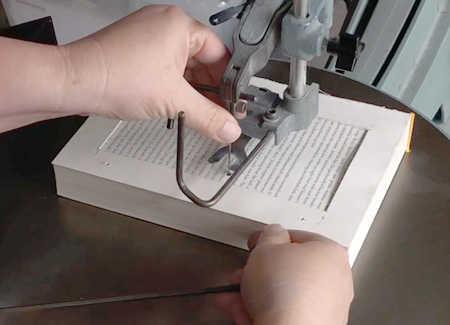 Step 20: Set up your scroll saw.
Thread the blade through the pilot hole and load it into the saw. (See the Supplies page for tips on scroll saw blades and where to get good ones.) Adjust the saw's hold-down clamp to apply a bit of pressure: you want to keep the page block from jumping up and down during sawing, but you also want to be able to move it around easily.
Note to experienced scroll saw-ers: you can skim the following instructions, as they're mostly for scroll saw neophytes. You probably know how to turn a corner.
Tip: Use new, sharp blades for large and tough books. Use older, duller blades on easy books to keep your work slow and controlled.
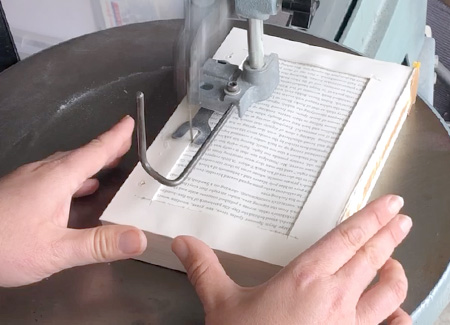
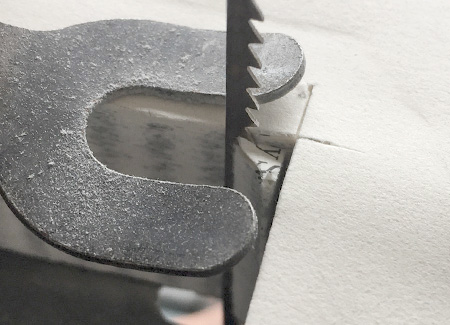
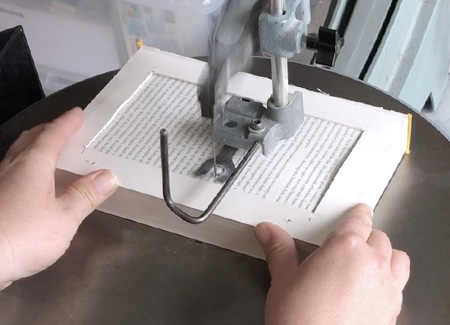 Step 21: Saw out of the pilot hole and into the first side.
Turn the saw on. Gently push the page block against the blade to cut towards the outside edge.
The sawing speed will vary greatly depending on the thickness of the book, paper type, and blade sharpness. Large books with thin, dense pages may move one millimeter at a time, but thinner books or books with light, fluffy pages will cut like butter.
 When the blade gets about 1/4 inch from the wall, start turning the book so that the cut gradually curves around to run along the first side. Because the blade is large, you can't make very tight curves (forcing the blade to turn too sharply will break it) so give yourself space to make the turn.
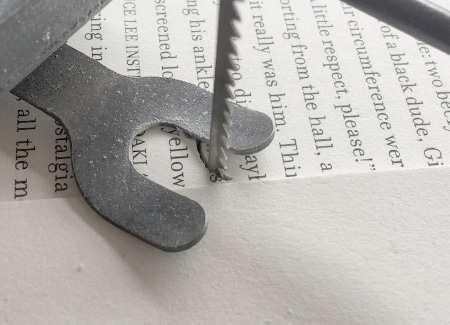
 Step 22: Saw down the first side.
Start cutting the first side of the cavity. Follow the walls of the rectangle you made with the box cutter.
Keep the cut straight by keeping the side of the blade exactly at the edge of the rectangle! (See the photo on the left.)
Move the page block in whatever way is necessary to keep the blade aligned at the inside of the rectangle. This way, the blade will complete the cut that the box cutter started, and leave a perfectly smooth cavity wall in its wake.
 Tip: Keep in mind that scroll saws DO NOT CUT STRAIGHT!!!
Scroll saws cut at an angle, and to compensate, you have to feed the book into the blade at an opposing angle in order to make a straight cut. The angle of the scroll saw's cut, and thus the angle you have to push the book in, is always changing based on the wear of the blade and the invisible grain of the paper.
Like trying to drive straight in a car with badly aligned wheels, cutting straight on a scroll saw requires constant corrections to keep the final product on track. Learning how to make a good cut takes lots of practice.
 Tip: If you're going to go off track, err on the side of cutting inwards, instead of outside.
The "mistake" cut on this photo has been exaggerated for effect, but the point is that a cut inside the cavity makes a bump that can simply be "sanded" off later, but a cut outside the rectangle, towards the edge of the book, is hard to fix.
 Tip: Let the blade take the wheel from time to time.
Don't force the blade to bend by inadvertently pushing the book to the left or right. Every now and then, take pressure off the page block and let the blade pull it back towards the center.
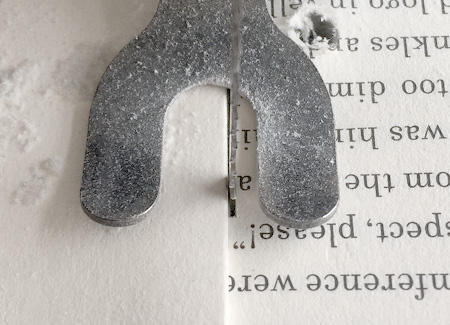
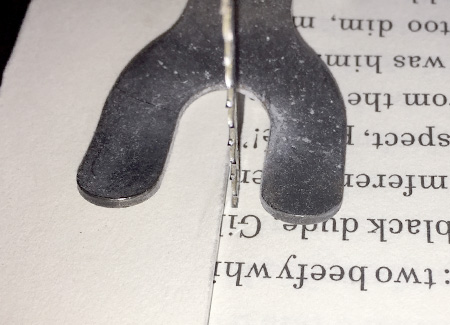
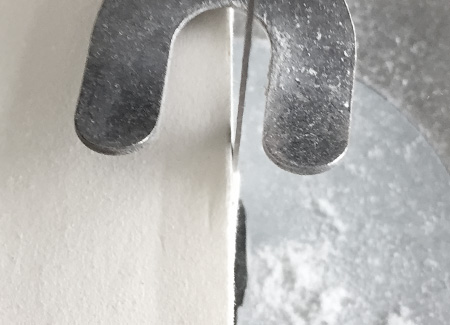
 Step 23: Make the first corner.
Saw straight until the blade touches first corner, then back up (keeping the saw running at all times) and saw a new path around the corner, heading into the next side. You'll come back and finish that corner later.
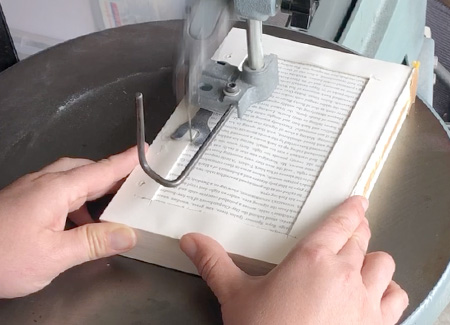
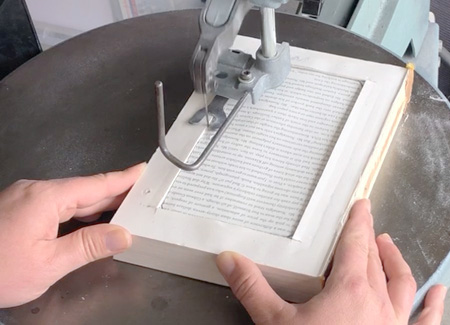 Step 24: Saw the rest of the sides.
Repeat Steps 22 and 23 around the rest of the page block, sawing straight down the sides and working around the corners. If any pages on the top come loose in the process of sawing, go ahead and remove them.
Once you arrive back at the first cut, the inside of the page block will be cut free.
 Step 25: Remove the cut pages.
Turn off the saw, pull out the cut pages, and shop vac away the extra dust. You now have a rough cavity, but it needs cleaning up.
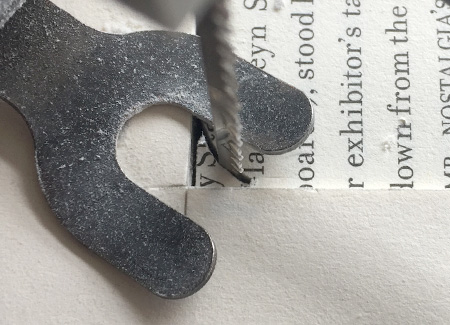
 Step 26: Cut off the corners.
Turn the page block around and saw off those hanging corners. Once again, keep the side of the blade exactly at the edge of the box cutter-made rectangle.
You'll know you've finished cutting the corner when the hanging paper bits fly off like confetti.
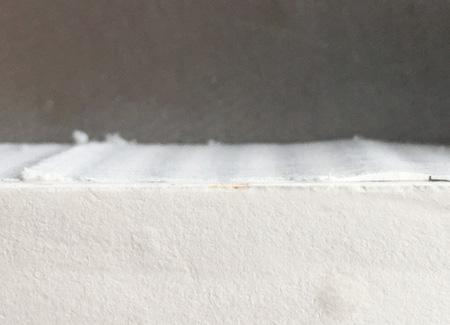 Step 27: "Sand" off any bumps or irregularities.
Look straight down at the sides and compare the scroll saw cut with the box cutter cut. This makes it easy to see any areas that are rough or uneven.
In this photo, the exaggerated "mistake" from earlier can be seen on the right, and a rough bump from the first cut can be seen on the left. Both need to be "sanded" off.
 Your scroll saw now doubles as a sander. Turn the saw back on and gently run the bumps or rough patches against the blade to grind them off. As with cutting, getting good at this will take practice.
 Step 28: Take the page block off the saw and clean up.
All done with sawing! Take out the blade, remove your page block, and take a shop vac to your work space. Then it's time to head back to the glue.
Tip: How long does it take to saw a page block? It usually takes me anywhere from 15 minutes to a full hour, depending on the book and the sharpness of the blade.
Stage 4: Putting the book back together
 Step 29: Put the dust jacket back on.
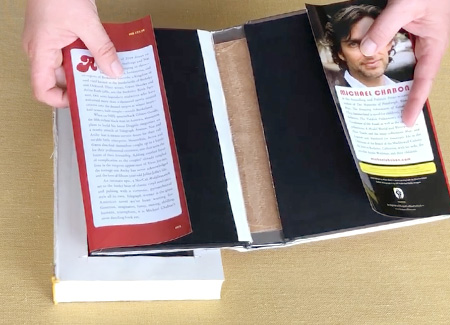
 Step 30: Trace the cavity on the back dust jacket flap.
We don't want the back flap to be visible inside the cavity, so we have to cut out a piece of it.
Place the page block back down where it used to be, lining up the bottom edges to the back endpaper. Trace the inside of the cavity onto the flap. (Don't mark the back endpaper!)
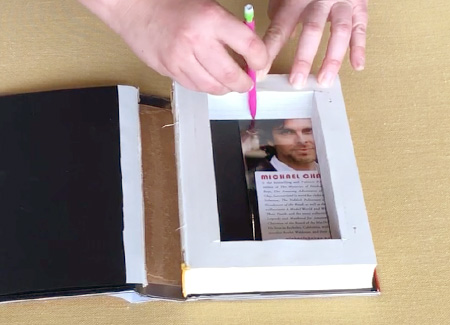
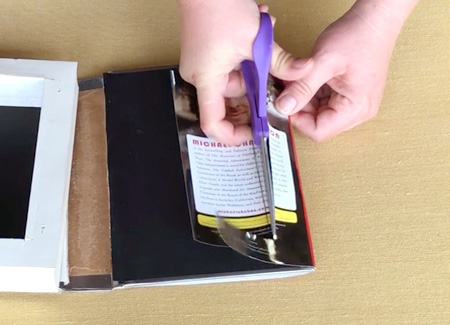 Step 31: Cut the rectangle from the dust jacket flap.
Take the scissors and cut outside the line by 1/4 inch or so. This doesn't have to be neat or precise; you just want to make sure the flap won't be visible in the final product.
 Step 32: Glue down the back dust jacket flap.
Brush glue on the back cover, underneath the dust jacket flap. Press the flap down, making sure it's straight and aligned with the cover.
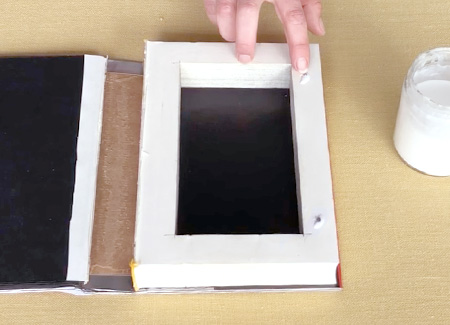
 Step 33: Glue the page block onto the back cover.
Take the page block and coat the entire bottom with a thin layer of glue.
 Put the page block down where it used to be, lining up the bottom edges against the back cover's endpaper.
 Close the book to make sure the front and back covers are straight and lined up with each other. If necessary, nudge the page block around until the covers are aligned.
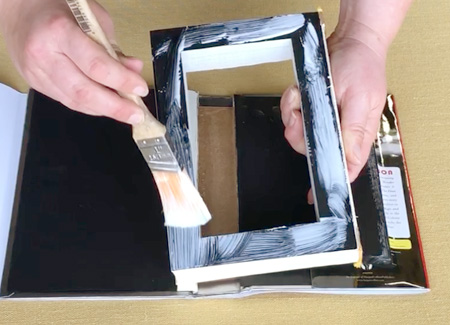
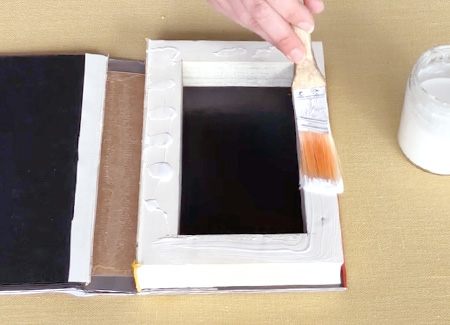
 Step 34: Paint glue over the inside of the cavity.
Take your time on this step. Paint glue around the sides of the cavity and over the entire bottom. Run the brush over all surfaces multiple times to make sure the entire inside is evenly coated. The wedge brush is good for working extra glue out of the corners and bottom edges.
The glue should be a solid coat, but not so thick that it runs down the sides or pools at the bottom.
 Step 35: Weigh it down again and let it dry.
Put the top slab onto the book and weigh it down again. (Once again, if the glue might stick to the top slab, put a layer of plastic underneath it.)
Check on it after 15 minutes or so, to make sure there aren't any glue drips or unsightly bubbles. If it looks good, let it dry for another 24 hours.
Stage 5: Adding the magnets and finishing the book
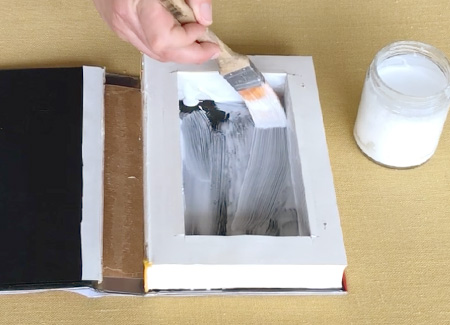
 Step 36: Trim the inside glue.
After the inside glue has dried, take the weight and the top slab off.
Use a blade to trim protruding dry glue off the inside of the cavity, just like you did when you trimmed the outside of the page block.
 Step 37: Insert the bottom magnets.
Put a small blob of glue over both holes, then insert the two bottom magnets. Press them in and make sure they're flush with the surface of the page block, not protruding above it.
 Step 38: Glue down the front endpaper.
Brush a thin layer of glue around the top of the page block.
 Lay the endpaper down onto the page block, lining it up at the edges. Press it down and smooth it out by hand.
 Step 39: Weigh the book down and let it dry again.
Put the top slab and the weight back onto the page block for another 24 hour period.
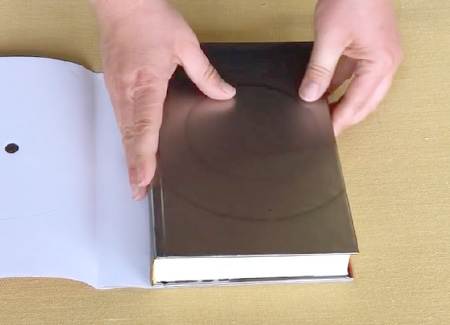
 Step 40: Mark the placement of the cover magnets.
Place two magnets on top of the now-hidden bottom magnets, letting them snap into place.
 Color the top of a magnet with permanent marker.
 Quickly close the cover down onto the magnet.
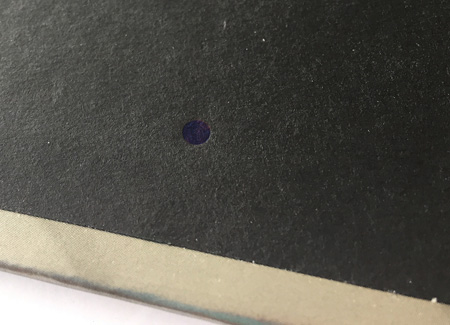 There's now a dot on the cover where a magnet will go. Repeat this step if you don't get a clear impression on the first try.
Do the same procedure to mark the location of the second cover magnet.
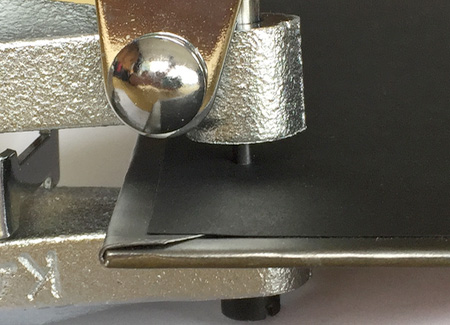 Step 41: Punch magnet holes in the top cover.
Load the die punch with 1/8 inch bits. Line up the punch bit exactly on the dot, and punch through the cover.
 Punch the second hole the same way.
Afterwards, close the cover and make sure the holes line up with the top magnets. If a hole is off, you can punch again to widen the hole in the right direction.
Tip: Don't want to buy a die punch?
You might be able to use a drill. I haven't done this, so I'm not in a position to offer tips, but it should be possible. The benefit of the die punch is that it makes holes that are exactly the same size as the magnets.
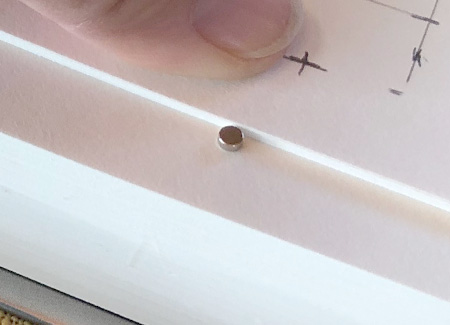
 Step 42: Insert the top magnets.
One at a time, put the magnets (inked side up) on your finger and push them up into their holes from underneath the cover.
 Here's a cover magnet inserted into a hole. The bottom of the cover magnets should be flush with the inside of the cover, so that the top and bottom magnets are as close to each other as possible when the book is finished.
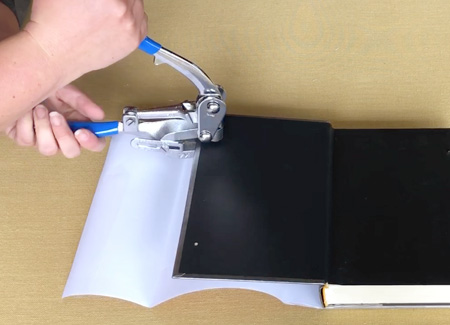
 Step 43: Glue the dust jacket flap down.
Dab two small blobs of glue over the magnets in the cover, then brush glue over the entire dust jacket flap.
 Paint glue to the edges on all sides.
 Fold the dust jacket flap over the cover. Make sure it's straight and lined up with the edges. The top magnets are now hidden and protected.
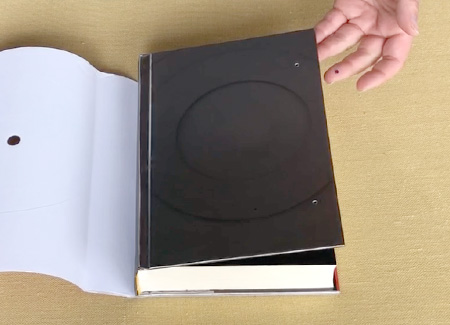
 Step 44: Weigh it down and let it dry one last time.
Insert a piece of plastic between the cover and the page block
to keep errant glue from fusing the book together.
 Close the book and weight it down. This time, it only has to dry for a few hours.
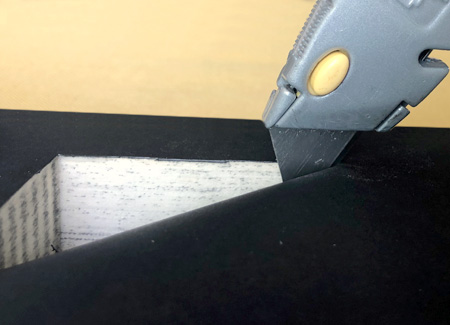 Step 45: Cut the top endpaper.
Since the sides and corners of the cavity are hidden under the endpaper, you have to explore a bit to find the first side.
Insert a blade near a corner, and then carefully slide it towards the edge. Once you've found a side of the cavity, run the blade along that side until it stops in the corner.
Now that you've found a corner, you can start there to cut out the next side. Repeat this process around the cavity.
 Clean up the edges and corners with an X-Acto knife, if necessary. Do a final inspection to make sure the entire book looks good.
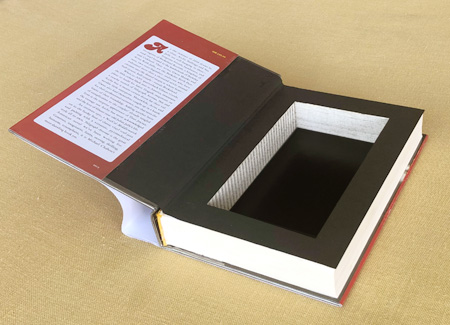
And you're done! Nice, isn't it?
FAQ: How long does this process take?
It looks like a lot, but since I make multiple books at the same time, I end up spending between an hour and a half to two hours of labor to make each one.