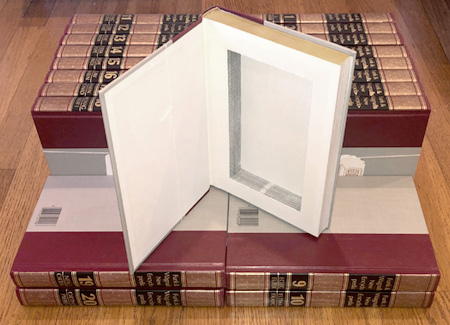
 Where to Get Books:
Cheap books can be found at yard sales, thrift stores, library sales, used book stores, and dollar stores. Some thrift shops (cough-Goodwill-cough) can charge surprisingly high prices for old books, even ones in bad condition. My favorite places to shop are dollar stores and library sales, so I pay only a buck or two (at most) for hardcovers. If you're looking for a specific book, you can try to find used ones online or at your nearest used book store.
Consider practice books. When I did my first batch of scroll saw book safes, I botched half of them so badly that I had to cover them up the interior cavity with a padded fabric interior. The more I did, the better I got, so don't be afraid to get a bunch of junk books and practice with those first. These unwanted encyclopedias (pictured to the left) were destined for a dumpster, but they became the perfect practice books.
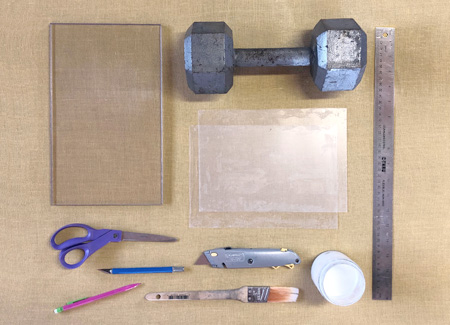 Basic Hardcover Supplies:
Weights: 25 to 40 pounds, for pressing the book flat while the glue dries. I use hex dumbbells because they're easy to move and they don't roll, but any heavy object will work.
Top slab: a flat, smooth, and sturdy surface for distributing weight evenly across the whole book while the glue is drying. Anything strong and flat will work, but I use thick acrylic sheets (gotten out of Tap Plastic's scrap bin for a few bucks) for two reasons: 1) I can see through the slab to inspect the book as its drying; and 2) because the glue won't stick to the slick surface.
Ruler: one with a cork back will keep it from slipping while you cut.
Thin plastic sheets: they separate everything you don't want to glue together. You can also use plastic wrap.
Scissors: any kind.
X-Acto knife: for light, precision cuts and clean-up.
Box cutter: for cuts where you need to get a grip or press hard. Make sure it's got a sharp blade.
Pencil: any kind
Glue brush: a 1-inch width is about the right size, and a wedge shape is good for getting into corners.
Glue: I've tested several glues and nothing works better than plain ol' Elmer's White Glue. It lasts, it makes a nice finish, and it's cheap. I purchase mine by the jug from Blick's Art Supplies. Make sure to use "White Glue", not the less expensive "School Glue".
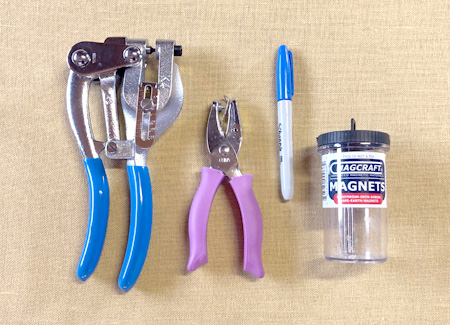 For Adding Magnets:
Die punch: for putting the holes in the hard cover. I got mine from Amazon. Load it with the 1/8 inch bits.
Paper punch: with a 1/8 inch die, as opposed to the usual 1/4 inch.
Permanent marker: any brand or dark color will do.
Rare earth magnets: round, 1/16 inch height and 1/8 inch width. I've had very good experience with Magnets Warehouse on eBay. Their magnets are strong and their customer service is great!
Note: If you don't want to purchase a die punch, it might be possible to drill the holes for the magnets. I haven't done this, so I'm not in a position to offer tips, but it should be possible. The main benefit of the die punch is that it makes holes that are exactly the same size as the magnets, so they stay snugly in place.
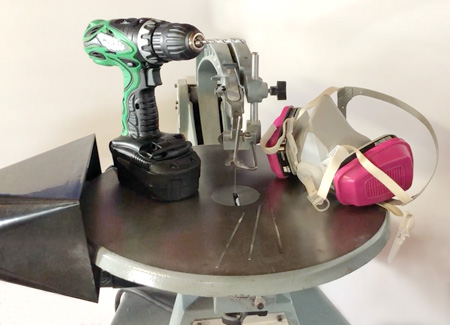 In the Shop:
Drill with drill bit: any drill press or cordless drill will do, with a drill bit around 3/16 inch. You use it to put a hole through the pages so you can insert a scroll saw blade.
Woodworking mask: get a good one with filters for very fine particles. You'll need it.
Shop vac (not pictured): used for cleaning up paper dust from the saw. I vacuum after sawing every book, and sometimes even in the middle of one, if it's a particularly large book.
Scroll saw: unfortunately, I'm not a scroll saw expert and can't make recommendations for any specific model. (I use an older Delta model gotten off Craigslist.) If you're buying one, you should know that larger machines are more expensive, but accommodate bigger books. Scroll saws take either "standard"/"pin-less" blades, or "pinned" blades, and both have benefits: pin-less blades require a smaller hole in the book, but pinned blades are easier to find in big box hardware stores, and are usually larger and wider, and thus tougher.
Dust collection: this process kicks out a LOT of fine paper dust, so you want to have something in place. Newer scroll saws have built-in dust collection tubes, but for my older scroll saw, I placed a dust collector intake (that black object on the left) at the edge of the saw table with the hope that it will suck up most of the dust generated above and below the table.
 Scroll Saw Blades:
You want beefy and aggressive blades, and you might have to buy them online. A scroll saw is typically a fine-detail tool, the surgery scalpel of the woodworking world, but we're using it to remove a limb.
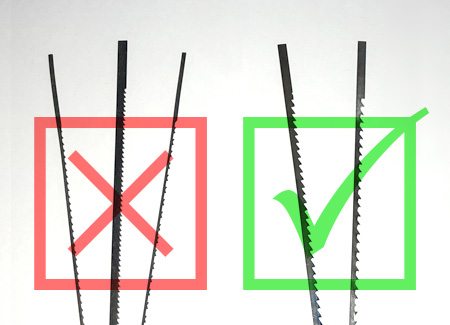
Your blades need to cut up thick stacks of paper and not get pushed around in the process. They should be wide: at least 0.10 inch from front to back. They should have low TPI (teeth per inch): 10 or fewer. Blades like this will tear up wood but do a nice, smooth job on books.
My machine uses pinless blades, and there are only two that I use: Pegas SSB-83 blades (the leftmost "good" one), which I buy from Bear Woods, and Olsen 42002 blades (on the far right), which I buy from my local Woodcrafters, although they can also be ordered in bulk from Olsen (bulk SKU FR420RGR).
I've run head-to-head tests, and both blades perform about the same, both in working speed and blade longevity. Olsen blades have wider teeth spacing for more aggressive (and thus faster) cuts. The Pegas blades have tighter teeth spacing, which makes them perform better when "sanding" the inside of the cavity, and they're a bit cheaper. I like to keep both on hand.
Pinned blades are easier to find in big sizes, because they have to be wider to accommodate the pins welded onto both sides.
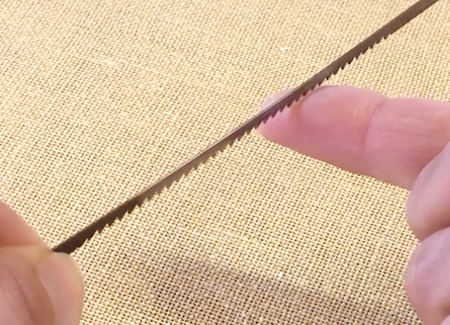 Tip: How will you know when to replace dull or fatigued blades?
If cutting through even a small book it taking too long, or if the blade seems to be bending too easily, take it out and VERY gently run your finger against the teeth. Your finger will slide across a dull blade but catch on a sharp one. Again, learning when to give up on a blade takes practice.
Tip: What if the blade breaks?
Scroll saw blades break all the time... when using the "usual" thin and fragile blades. The big blades used for book safes should not break easily. You should be discarding three dull blades for every broken one. If blades are breaking more frequently than that, start experimenting with the blade tension or the saw speed (I hover around 1500 SMP), and make sure you're not pushing the page block too hard (or to the side) when sawing. Check your position while sawing by taking pressure off the page block and letting the blade center it.
 Bonus: Videos for Scroll Saw Tips and Tricks
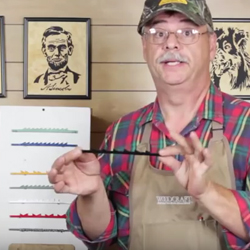
The best way to make a book safe is with a scroll saw, but what if you haven't used one since high school woodshop, or haven't ever used one at all? Mustache Mike's Scroll Saw Tips is a great series on selecting blades, making turns and corners, cutting straight, and more.
The Biggest Tip to Keep in Mind:
This applies to all instructions on this site: just because this is the best method I've come up with, doesn't mean it's the best method, period. Part of crafting is taking a technique and making it your own, figuring out new and better ways to do things in the process. I made these tutorials because I thought I had figured out a better way to make book safes, and I'm sure you'll come up with your own ways that are even better.
