 You Will Need
- Hardcover book
Note: A dust jacket is optional but recommended - Box cutter or an X-Acto knife, with a fresh blade
Note: Box cutters are easier on your hand when pressing hard and cutting deep. - Ruler (preferably metal), at least an inch wide
- Plastic wrap
- White glue
- Glue brush
- Large rubber band
- A pencil
- A vacuum (not pictured) to clean up the paper shreds and dust around your work area
Stage 1: Prep Work
 Step 1: Remove the dust jacket.
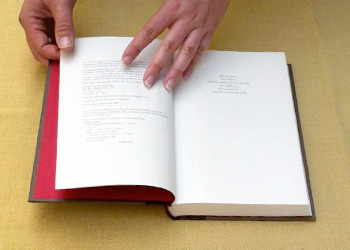 Step 2: Find your starting page.
Pick the last page you want to see on the left before the cavity.
 Note: If you don't want any loose pages in your book safe, meaning that when you open the cover you see the cavity, you can skip Step 2.
 Step 3: Pull back one more page.
Take one more page from the book and flip it over to the left. This will become your "cover-up" page, concealing pencil and cut marks.
 Step 4: Rubber band the pages on the left.
This will keep them with the cover, and out of the way for your all-important first cut.
Stage 2: Cutting
 Step 5: Draw your outline.
Line the ruler up along the side, flush with the edge of the pages. Draw a line on the inside, from the top to the bottom of the page. Repeat for all sides.
 You should get something that looks like the picture on the left.
Note: If you want a specific size cavity, then you can measure and draw one. The "walls" of the cavity should be at least an inch thick.
 Step 6: Start cutting.
Line up the ruler and cut along the lines on all 4 sides with the box cutter. The four rules for this are:
• Cut beyond the corners
• Cut straight
• Cut deep
• Cut repeatedly
That means you start and end the cut about half an inch outside of the rectangle you've drawn. Cut straight down and press hard with the blade. Then while keeping the ruler in place, make the same cut over and over again, about 3-5 times, cutting deeper and deeper into the book each time. When I use a fresh blade and cut 4 times per side, I can cut more than 1/4 inch deep through the pages.
 Once you've cut one side, move the ruler and cut the other 3 sides the same way.
The red in this image shows where the cut marks should be when you're done.
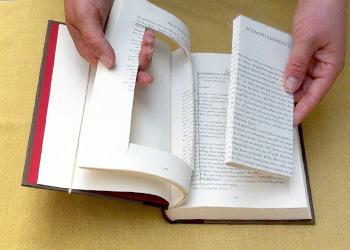 Step 7: Turn over all the pages that are cut clean through.
Go through the pages and flip over all the ones that are cut completely through on all 4 sides. You will have several pages that are partially cut, but not all the way to the corners. Leave these where they are.
 Step 8: Rubber band the cut pages to the cover.
This will keep them out of the way.
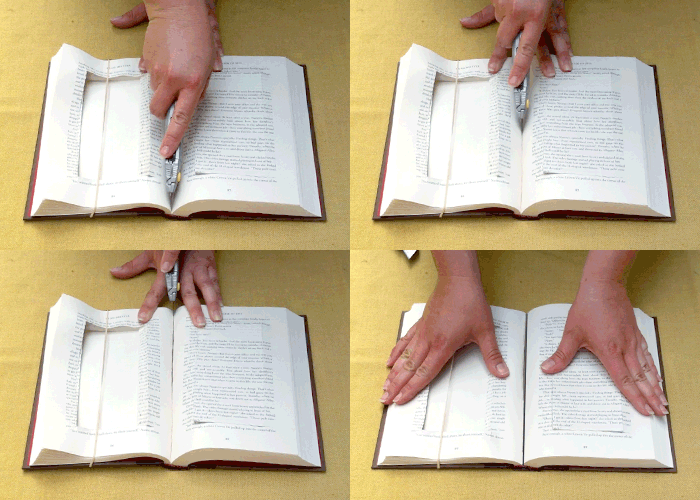 Step 9: Cut the binding by running the blade between the pages.
This will make it easier to flip the cut pages out of the way. Press the blade lightly and make a few passes, if you have to.
The idea is to cut the binding, without cutting through to the spine. If you cut too deep, it won't ruin the book, but it will make it harder to line up the pages evenly when it comes time to glue it.
 Oops! The blade went too far on this one and I cut through the spine! That's okay; the dust jacket will cover it up when I put it back on.
 Step 10: Repeat steps 6, 7, 8, and 9, as you cut your way through the book.
You know those pages that were cut, but not all the way through to the corners? The pages you didn't turn over in Step 7? Well, now they're going to be your guide for the next set of cuts.
Line up the ruler along a cut already in the page, then start slicing again (Step 6). Remember to cut beyond the corners, cut straight, cut deep, and cut repeatedly. After you've cut all 4 sides again, turn all the pages that were cut clean through (Step 7) and rubber band them (Step 8), then slice the binding (Step 9), then start cutting again.
 Note: If you want clean walls on the inside cavity, make sure the remaining pages are straight. After you've cut down far enough, merely flipping the cut pages over is enough to pull the whole book at an angle. If you need to, clamp the pages, or hold the cover at a 90 degree angle upwards while you cut.
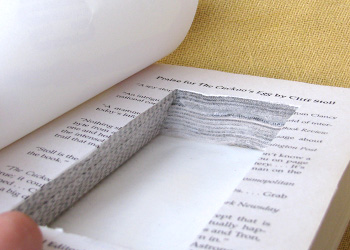 If the pages aren't straight when you cut, the cavity won't be straight when you're done. If you care about having straight edges, I'd recommend using The Nailed Method.
 Step 11: Continue until you reach the back.
Be careful once you get near the end so you don't slice the back cover. If you want, you can insert a piece of cardboard or backer board to keep yourself from cutting too far.
 Step 12: Clean up the cavity.
If you have paper bits or shreds sticking out, either tear them out or cut them off with the blade.
 Step 13: Replace the dust jacket and flip over the cut pages back into position.
Right now the back flap shows through the cavity. You have to cut it out so you don't see it in the finished book.
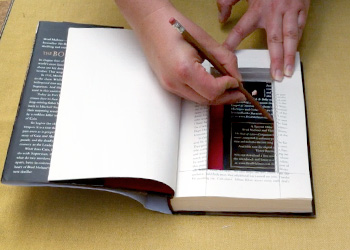 Step 14: Trace the cavity on the dust jacket's back flap.
Run the tip of the pen or pencil against the edge of the cavity, and draw a line all around on the back flap.
 Step 15: Cut out the back flap around the traced lines.
Cut outside the line by 1/4 inch or so, to make sure none of it shows in the cavity.
 Now the dust jacket isn't visible inside.
Stage 3: Gluing
 Step 16: Glue the back dust jacket flap down.
Run glue around the back cover, under where the flap sits, then press the back flap down.
Now flip the cut pages back into position.
 Step 17: Glue the inside of the cavity.
Squeeze a thick line of glue all around the inside of the cavity, then take the brush and spread the glue thinly but evenly over the cavity walls. This will take a minute.
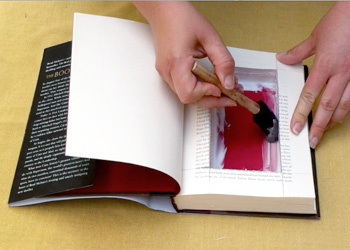 Repeatedly brush the glue over the inside walls. The glue will run down and pool on the bottom, so make sure to pick it up with the brush and spread it around.
While you're working, the glue may soak into the pages, looking like it disappeared. There's no need to apply more glue over these areas: too much glue will warp the pages. Only add more glue if there isn't enough to evenly coat the sides
A Note on Glues: I tested several glues recommended by other book safe tutorials: diluted white glue, Mod Podge, and Mod Podge Paper. None of them worked better than plain white glue, and all of them were more likely to warp the pages, thanks to a higher moisture content. Some other tutorials suggested rubber cement, which I haven't tested, but I imagine it would leave a tacky finish that could collect dirt.
 Step 18: Coat the bottom in glue.
Once the sides are evenly coated, brush an layer of glue on the bottom of the cavity. This will protect the back cover and give it a clean finish.
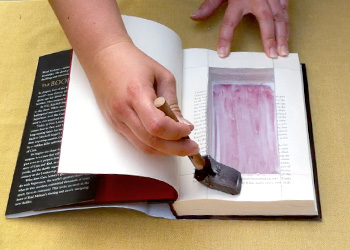 Step 19: Glue down the cover-up page.
Remember that one extra page you turned in Step 3? Now it's time to use it. Brush a thin but complete layer of glue all around the top page.
Turn the extra page back over and press it down.
 The pencil and cut marks are now hidden under the clean cover-up page.
 Step 20: Put plastic wrap on the cover-up page.
Tear off a long piece of plastic wrap and put it on top of the cover-up page. This will ensure the glue doesn't soak through to the top pages, sticking the whole book together.
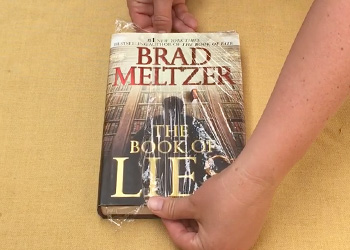 Step 21: Close the book and wrap the plastic around the top of the cover.
You want the plastic to encase the cover and any extra pages, keeping them safe and dry when you glue the outside.
(I should have used a larger piece of plastic wrap. Oops.)
 Step 22: Glue the outside of the pages.
Paint a very thin coat of glue around the pages on the outside, making sure to clean up drips with your brush. This glue keeps the outside of the pages from warping as the book dries.
 Step 23: Compress it and leave it to dry.
Close the book and press down by hand. Then pile a bunch of weight onto the book. You can use other books, cans, or whatever you can find. (I try to use at least 15 pounds.) Then leave it alone for at least 24 hours.
The book must be compressed to force the pages, which are getting wet from the glue, to stay straight until the glue dries.
A Note on Drying Times: While I say to wait at least 24 hours, it can depend heavily on weather and humidity. On hot dry days, I've had books dry in under 6 hours, but on cold rainy days, even 24 hours may not be enough. You can always open the book to see if there's any white (wet) glue left, which means the book needs more time.
If you can, err on the side of a longer drying time: if you take the pressure off before the glue is completely dry, the pages can warp.
 Step 24: Cut up the cover-up page.
When the book is dry, open up the book to the cover-up page. Carefully push the blade through the paper at the edge of the cavity. Run it along the edge to both corners.
 Repeat this for all for 4 sides, then remove the rectangle of cut paper.
 That's it! You're done!
Isn't it pretty?
 Note: Sides not clean enough? You can sand or grind the inside of the cavity by hand or with a Dremel or multi-tool.
If you want really clean and straight sides, get a scroll saw and follow one of the other tutorials.
